EPOS - Sales
INTRODUCTION
SECURITY
EPOS System Parameters
Override Price
Increase Maximum Sale Price
GROUP ACCESS RIGHTS
POINT of SALE
To start the till in Agility Professional, select the Screen ICON on the ribbon menu:
The till opens in CASH or TRADE:
Till Number: Is used in search facilities
Current User: The EPOSID for each user needs to be entered here and throughout the product.
When the user enters their EPOSID their name is shown below Current User.
Also, there is a timer set for 30 seconds and if nothing happens the user is logged out.
This is the maximum value.
Referred Trade Sale is where CASH is not ALLOWED at the till.
This is a grid, grids used throughout the Agility Pro product.
When a user enters their EPOSID, the grid and other buttons become enabled.
ENTERING STOCK:
Barcodes
If there is a barcode, scan the products barcode and it will return the item to the grid, and it will enter a quantity of one.
Description
Type a description of the product into the grid, and it will search for related stock codes when you press enter. For example, description is Hand Sanitiser, you can search for any part of this description, ha, han, san, etc. From here a selection of the correct stock code can be made.
Stock Code
If the stock code is known, it can be directly typed into the grid and the press enter. This will bring up a quantity screen, where a quantity can be entered. If the quantity is one, just press enter.
In Agility Professional the FUNCTION buttons on your keyboard (F1-F12) can be used instead of the mouse.
F1 Search
This button can be used to search for stock codes. (This is the same screen that will appear when performing the above actions; Description and Stock Code Search)
It is possible to search by Stock Code, Description, Preferred Supplier, Department, Category, Group, Type and Bin Location.
The following will need to be created in Agility before it is possible to search by them:
Department, Category, Group, Type and Bin Location. (ADD LINK TO DOCUMENT FOR THIS)
If the Search Glass is clicked in any screen throughout the product, then ALL items will be returned. Right Mouse Click (RMC) on the search glass to search by the name.
In Description enter part of the description to bring back stock relating to the search criteria.
Once a stock code has been selected using any of the above methods, the Amend Quantity screen appears - it defaults to 1, so if the quantity is 1 hit the ENTER button on the keyboard, or if it is more than 1, enter the quantity being sold and the hit ENTER.
If searching for a stock code where there is barcode that is the same as the stock code, the Amend Quantity screen will not appear.
Also, the stock availability:
Stock Available: Available to be bought
Total Stock: Including what has been allocated in the delivery/collection
On Order from Supplier: Self Explanatory.
F2 Exchange: records this as a minus quantity and sold and therefore an Invoice NOT Credit. See below for an example of this, the item that is being exchange is in red and is a minus value.
When F2 is selected, you will be asked’ Do you wish to return items to stock?’, if No is selected – there will be no stock movement for that item (you would normally only select No if you are not returning the item to the supplier).
Once the quantity has been selected, you will return back to the till screen:
F2 Override Qty:
(If the Stock code is scanned into the grid via the barcode, select the line then Press F2 to bring up the Override Qty, then F2 again to Exchange)
F3 Override Discount:
New Price: Is the actual Value it is to be sold including VAT
New Discount: The percentage (%) value e.g. 10, 5
Finalising Sale
Sub Total: This checks to see if there are any promotions assigned to any of the products being sold and recalculates the TOTAL if there is.
When the subtotal button is pressed the payment type buttons are revealed:
Function keys on keyboard work the same as clicking on the button.
F5 – Cash: Self Explanatory
F6 – Credit Card: Self Explanatory
F7 – Cheque: Self Explanatory
CTRL+F8 – Gift Card: Self Explanatory
F8 – Voucher: Self Explanatory
With Voucher and Gift Cards more businesses use the Gift Cards function than Vouchers
Save As Quote: If a customer changes their mind and only wants a Quote press this button. Quotes are explained later in this document
CTRL+F5 – Loyalty: Only works if the Loyalty module has been purchased and enabled.
Multiple payment types can be used, always make sure to select Credit Card last as this takes the remaining balance.
Agility Integrates with BOI, Payment Sense and OPAYO.
OPAYO is a third-party application that can utilise different merchant banks e.g. Elavon, BarclayCard etc.
When payment is made an invoice or Tally receipt will be produced. If Payment is by credit card, then also merchant and customer copy will be produced if integrated.
SCREENS FOR PAYMENT TYPES
CREDIT CARDS:
When Credit Card is selected in non-integrated mode:
The type of Credit Card may just say Credit Card as Agility does not store the type of card used.
Cash Back can be enabled/disabled by going to the Tools Menu. (See Tools Menu Settings Document)
Telesales?
Use the F9 button to clear the total, which is 249.00 in this example.
Press OK
The Price Variance screen now opens for other payment types to be taken. Another Credit Card can also be taken.
Shows Sales Total
Amount Received
And To Pay
Amount Paid now shows the outstanding balance
And the amount tendered
Select OK and the payment will be taken.
For integrated Credit Cards Right Mouse Click on the F6 Credit Card button to get the option to take multiple card payments.
We have partnered with a company called PROMMT which is a third-party application, that allows payments to be made via a link sent via email or text message. This is an additional module from Agility with extra costs.
Multiple Payment Methods Transactions (Integrated Card Terminals)
For transactions where multiple payment methods are used, such as more than one credit card or a credit card and a 1forALL card, or multiple 1forALL cards - do the following:
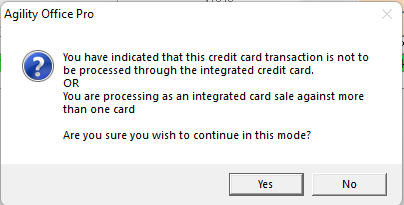
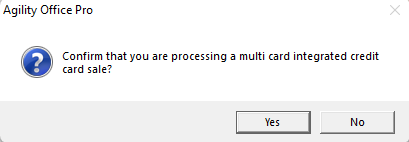
Right mouse click on the credit card button:
This message will appear, click YES:
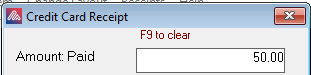
This window will then appear:
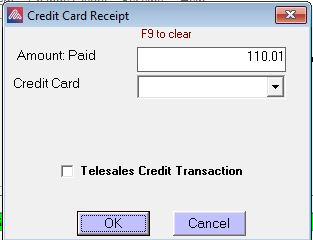
Press F9 on your keyboard to clear the Amount: Paid field to zero:
Then type in the amount you wish to take from the first card, in this example €50:
Then select Integrated from the Credit Card dropdown:

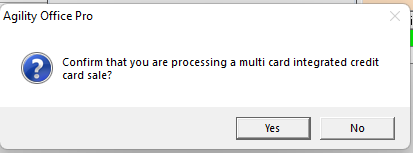
The below message will appear, click YES:
And then click OK to send the payment to the credit card terminal:
Have the customer use the first card:
Once the first payment is taken, this screen will appear:
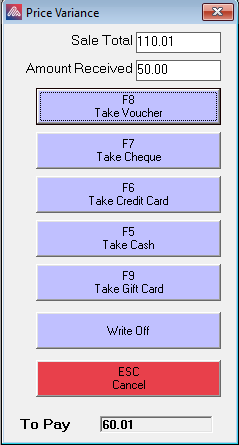
The above screen shows the Sale Total, how much has been received so far and then gives numerous different options for taking the remaining balance. And then at the bottom shows the remaining balance left to pay.
In this example we will take another card payment of €20, to do this click on the F6 Take Credit Card button:
Again, click yes to the below prompt:
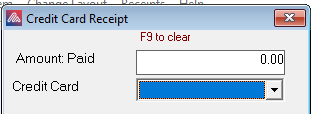
And then press F9 on your keyboard to clear the amount:
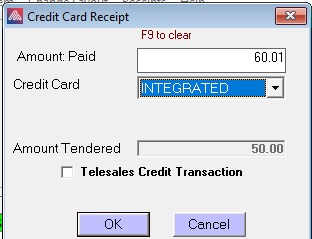
And then input the amount to pay (€20 in this example):
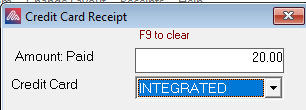
And then click OK to send the €20 payment to the credit card terminal:
Have the customer use the second card:
Once again, this screen will appear. Note how the Amount received is now €70, as we have take two payments of €50 and €20. And the remaining balance to pay is €40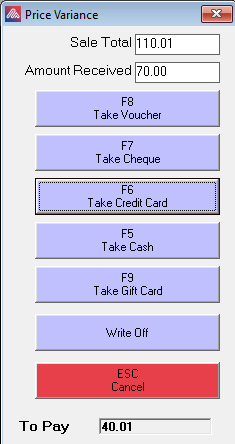
At this point we can take another card payment, or the customer may want to pay the remaining balance with cash or a gift card. Or continue to split the transaction further still. For this example, we will just take the remaining balance as another card payment.
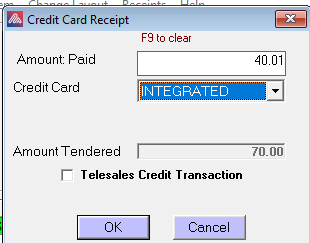
So we would click F6 Take Credit Card, then Yes to the message. Then we this appears, as we are taking the remaining balance, there is no need to use F9, we would just click OK:
This sends the final payment to the card machine, the customer pays and the the below prompt appears:

Select what you wish to print, and the press Enter on your keyboard.
CASH:
Type the total amount of cash given by the customer, Agility will automatically add the decimal point, so there is no need to type it in.
If a mistake is made, use the backspace delete key to remove the wrong value and re-enter.
Rounding is being applied.
F4 will cancel rounding.
Select OK to complete sale.
Related Articles
EPOS - Till Menus and Additional Buttons
INTRODUCTION On the actual till there is a ribbon menu and also a number of buttons that need explanation. SECURITY Group Access Rights Information to follow on what is driven by security. SALES Customer Price History - Disable History Button RIBBON ...EPOS - Selling Batched ITems
INTRODUCTION In Agility the user can sell different product e.g. Batched tracked, Multi Component, EMC etc. This example is for Batched tracked. In the KB about creating batched items the user can record a number or a number and expiry date. When ...Sale - Sales Orders
INTRODUCTION Sales Orders work directly with the delivery system and items can only be sold/despatched if there is a stock quantity. Create a Sales Order Navigate to Sales - Sales Orders and the screen that opens has the sale look and feel as ...Sales - Messages
Introduction Agility Pro has the option to add or link messages to customer accounts, products, etc. This document is a work in progress, and will be updated with more information To access this screen, click on the small Envelope on the menu bar of ...Sales - Edit Payment Type
Introduction When using non-integrated card payments, if a customer receipt is taken and accidentally put through as Cash instead of Card, there is a way to alter this. Security To enable this feature, go to Tools-Tools Menu-Security-Group Access ...